
EasyTerritory allows organizations to map records directly from Microsoft Dataverse (formerly Common Data Service) and visualize them on Azure Maps or Bing Maps.
Any Dataverse table that contains address information or geographic coordinates can be mapped in EasyTerritory without exporting or duplicating data. Records are either geocoded automatically or plotted using existing latitude and longitude values.
This documentation describes how to:
- Connecting EasyTerritory to Dataverse
- Creating a Dataverse view
- Mapping records from that view in EasyTerritory
Prerequisites
EasyTerritory must be configured to authenticate with Microsoft Entra ID (Azure Active Directory) and granted permission to read data from Dataverse.
Refer to the EasyTerritory documentation on Azure AD configuration before proceeding
Step 1. Create a Dataverse View
EasyTerritory reads data from Dataverse views, so you must first create and publish a view for the records you want to map.
- Sign in to Power Apps:
- Navigate to the table (entity) that contains the records you want to display.

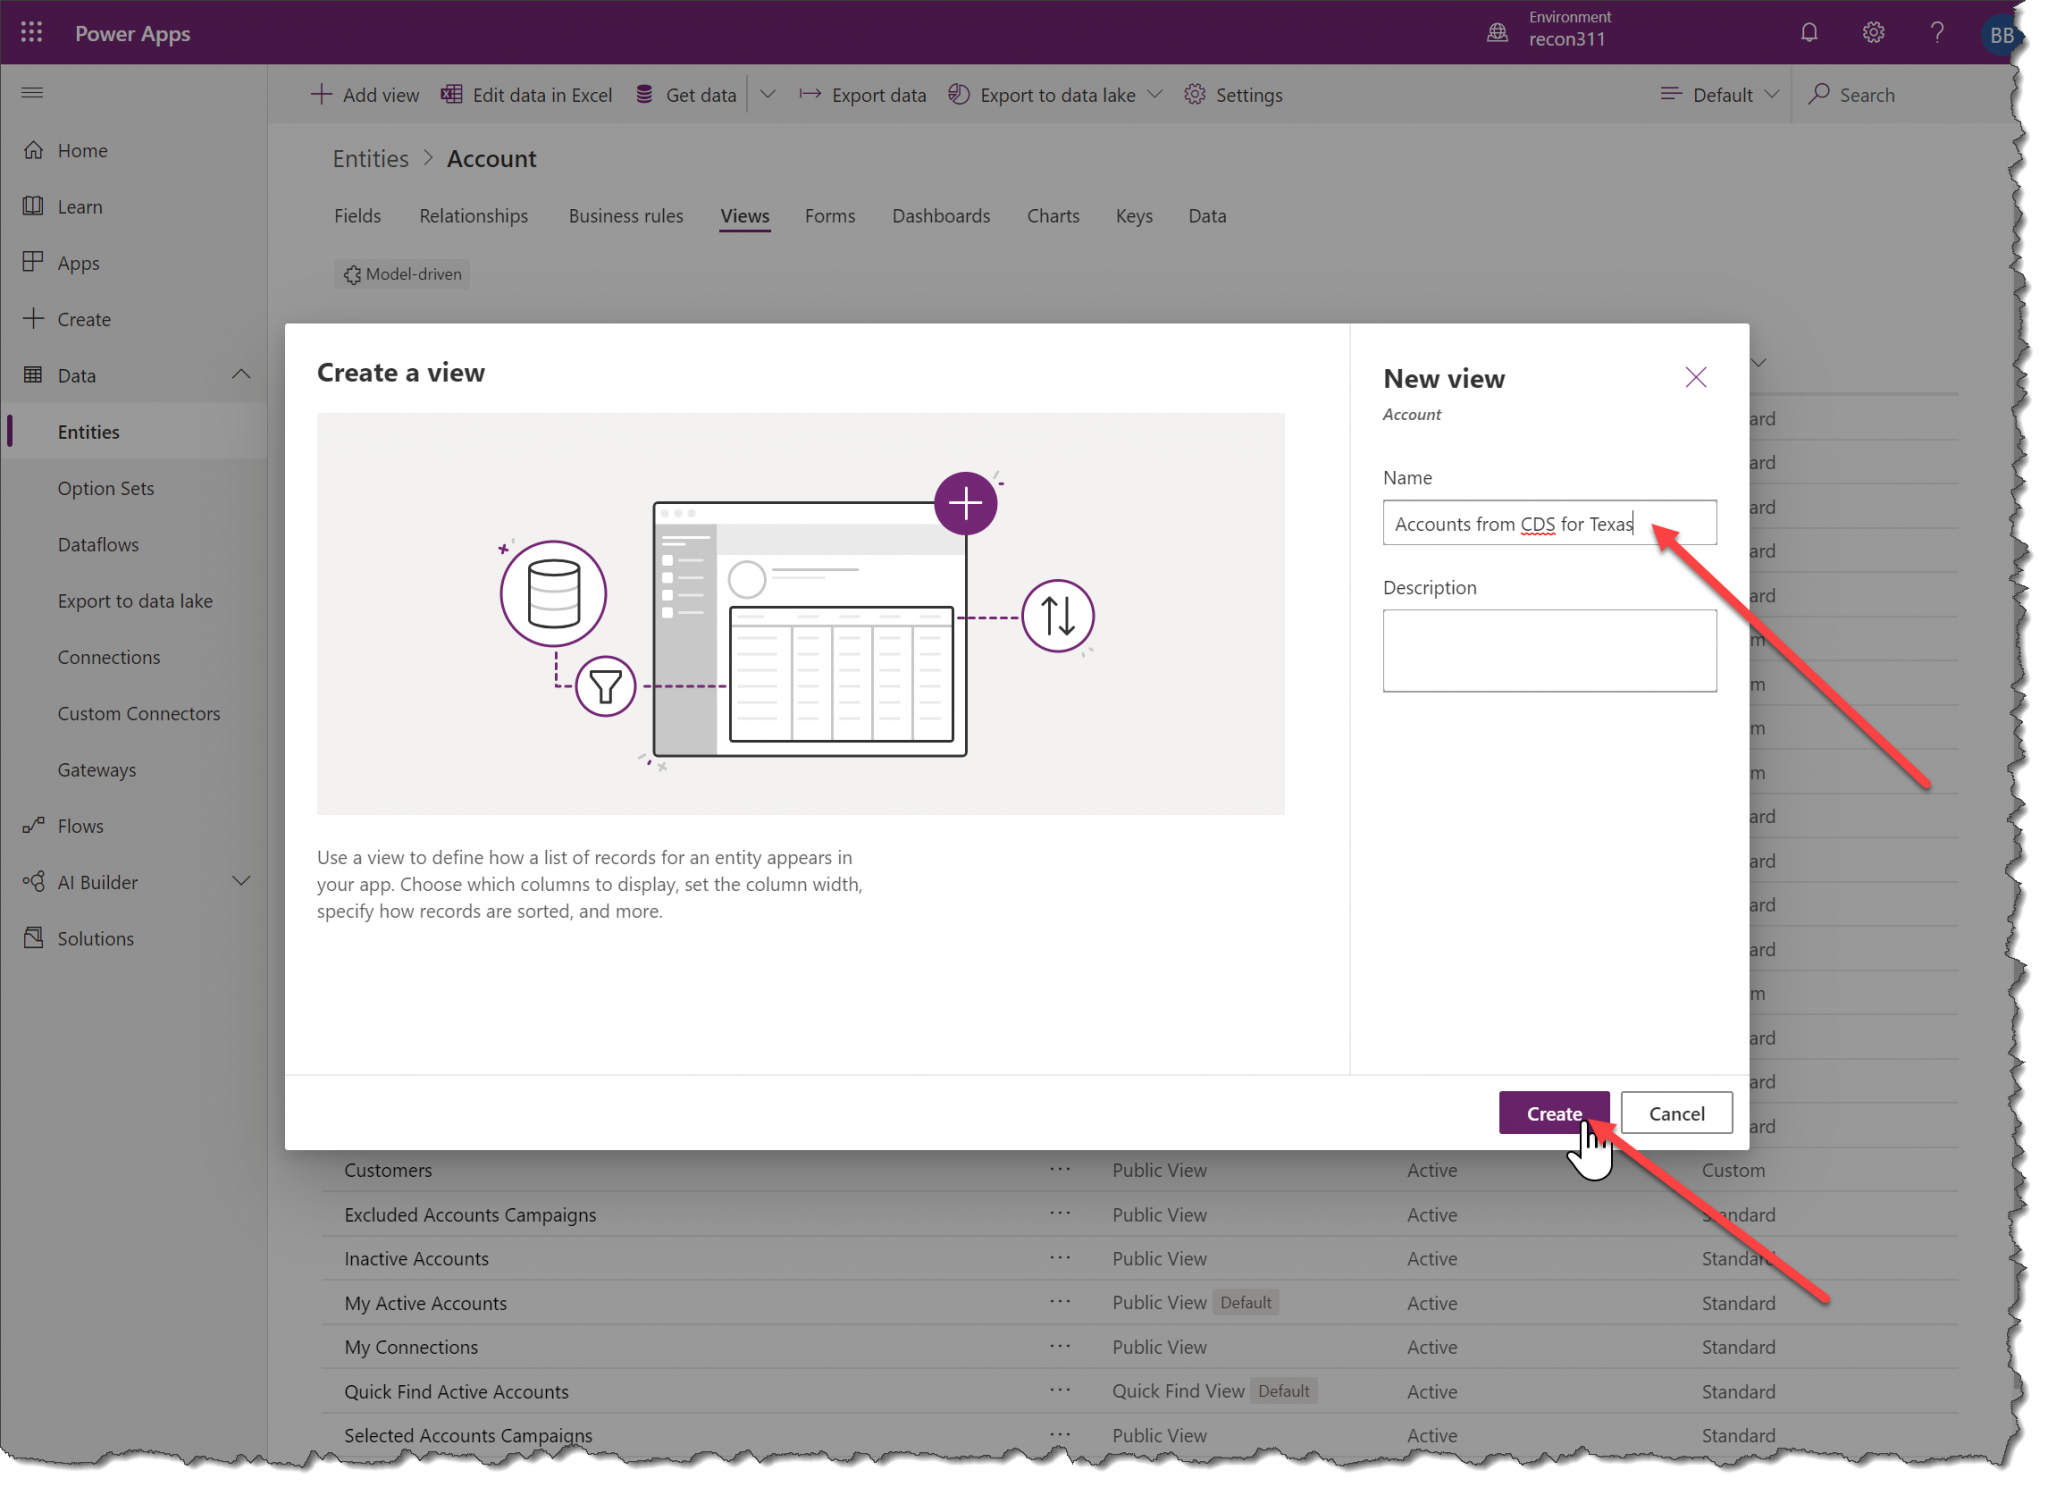
- Open Views and click + Add view.

- Enter a name for the view.
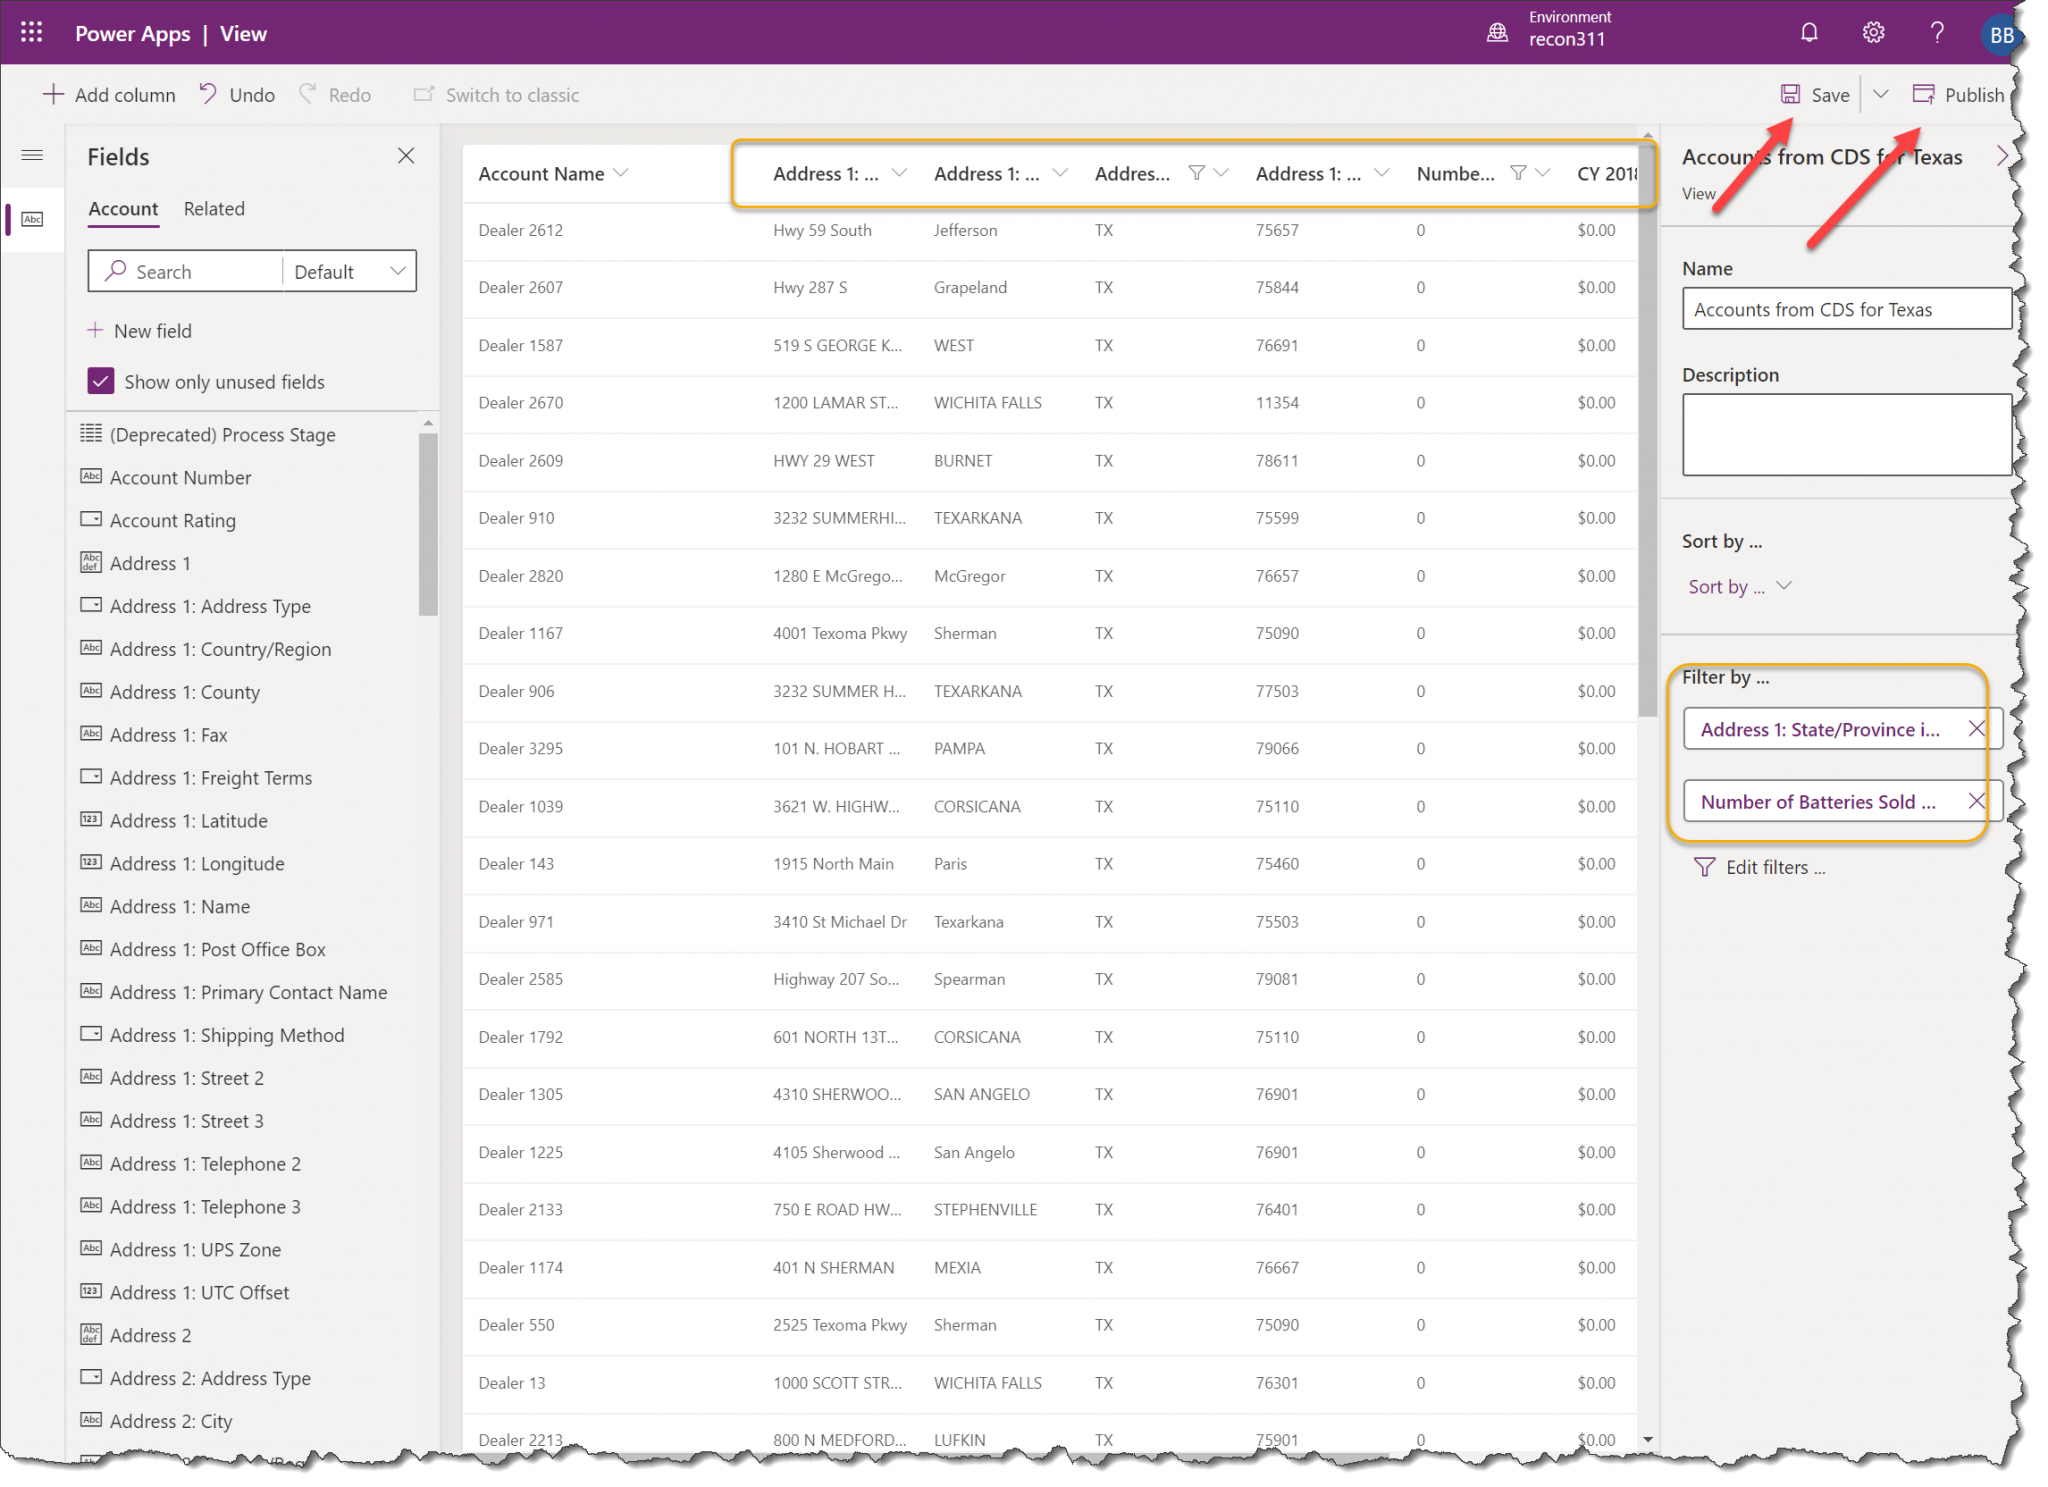
- Add any columns you want to make available in EasyTerritory.
- Save and publish the view
Step 2. Verify Location Fields
To map records in EasyTerritory, the Dataverse view must include either address fields or latitude and longitude fields.
Address-based Mapping
If latitude and longitude values are not present, EasyTerritory will geocode records using address fields such as:
- Address 1: Street
- Address 1: City
- Address 1: State/Province
- Address 1: ZIP/Postal Code
Coordinate-based Mapping
If records already contain geographic coordinates, include:
- Address 1: Latitude
- Address 1: Longitude
Note: Records that already contain latitude and longitude values will load faster because geocoding is not required.
Step 3. Upload the View in EasyTerritory
Once the view is created and published:
- Open EasyTerritory.
- From the top toolbar, click Data Upload.
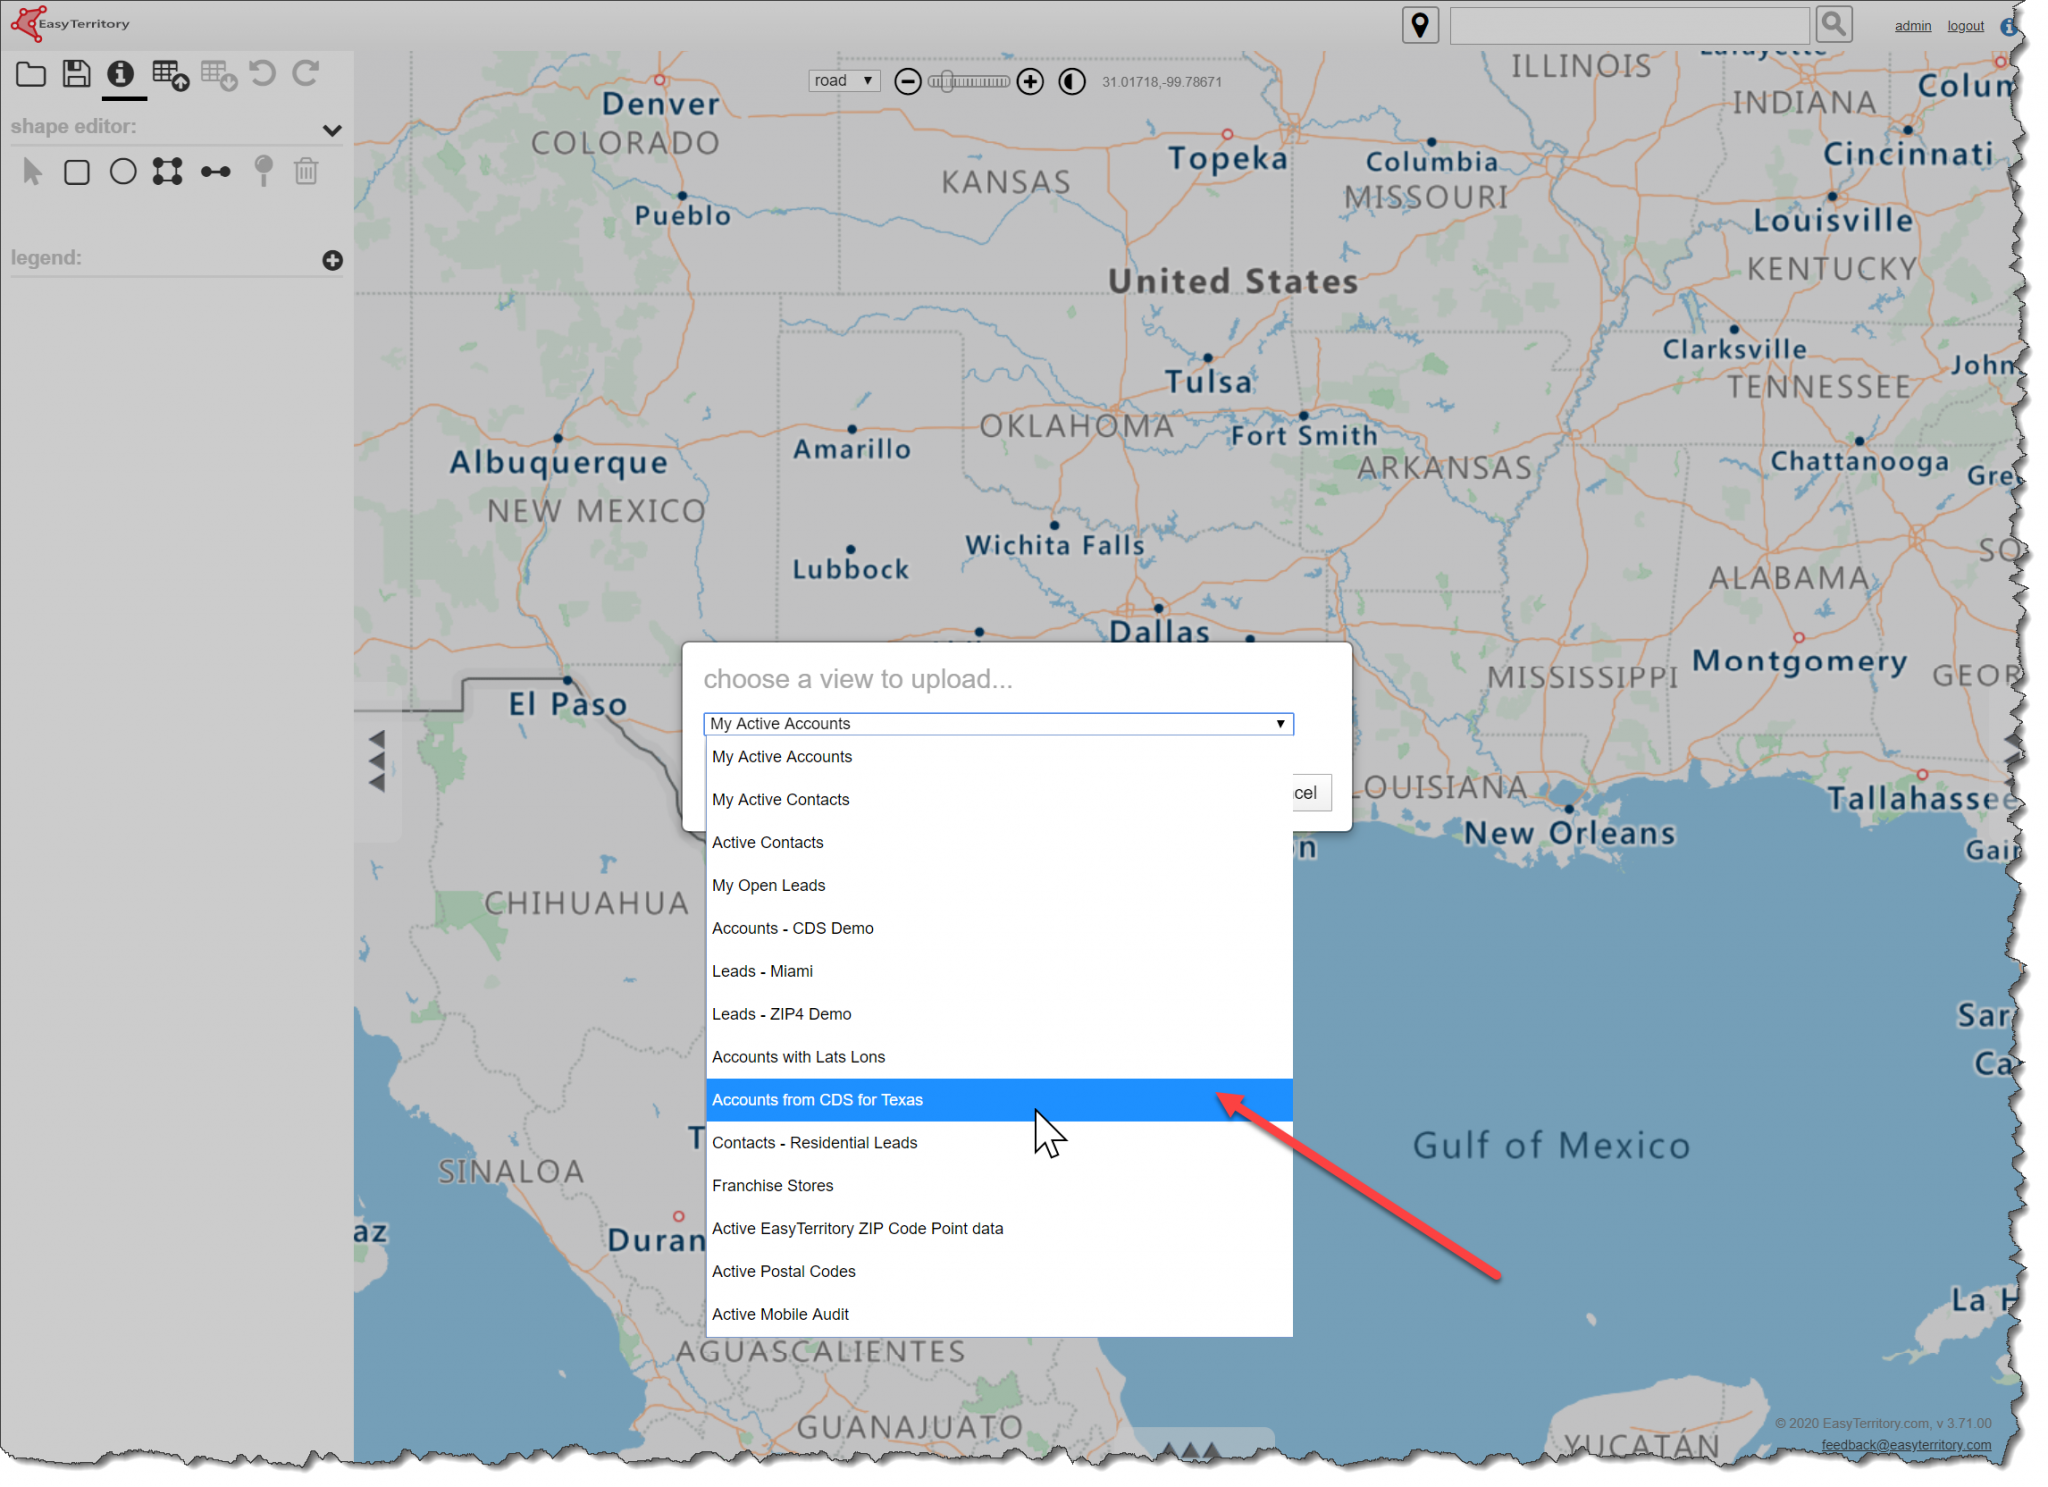
- Select Upload a view from Dynamics 365.
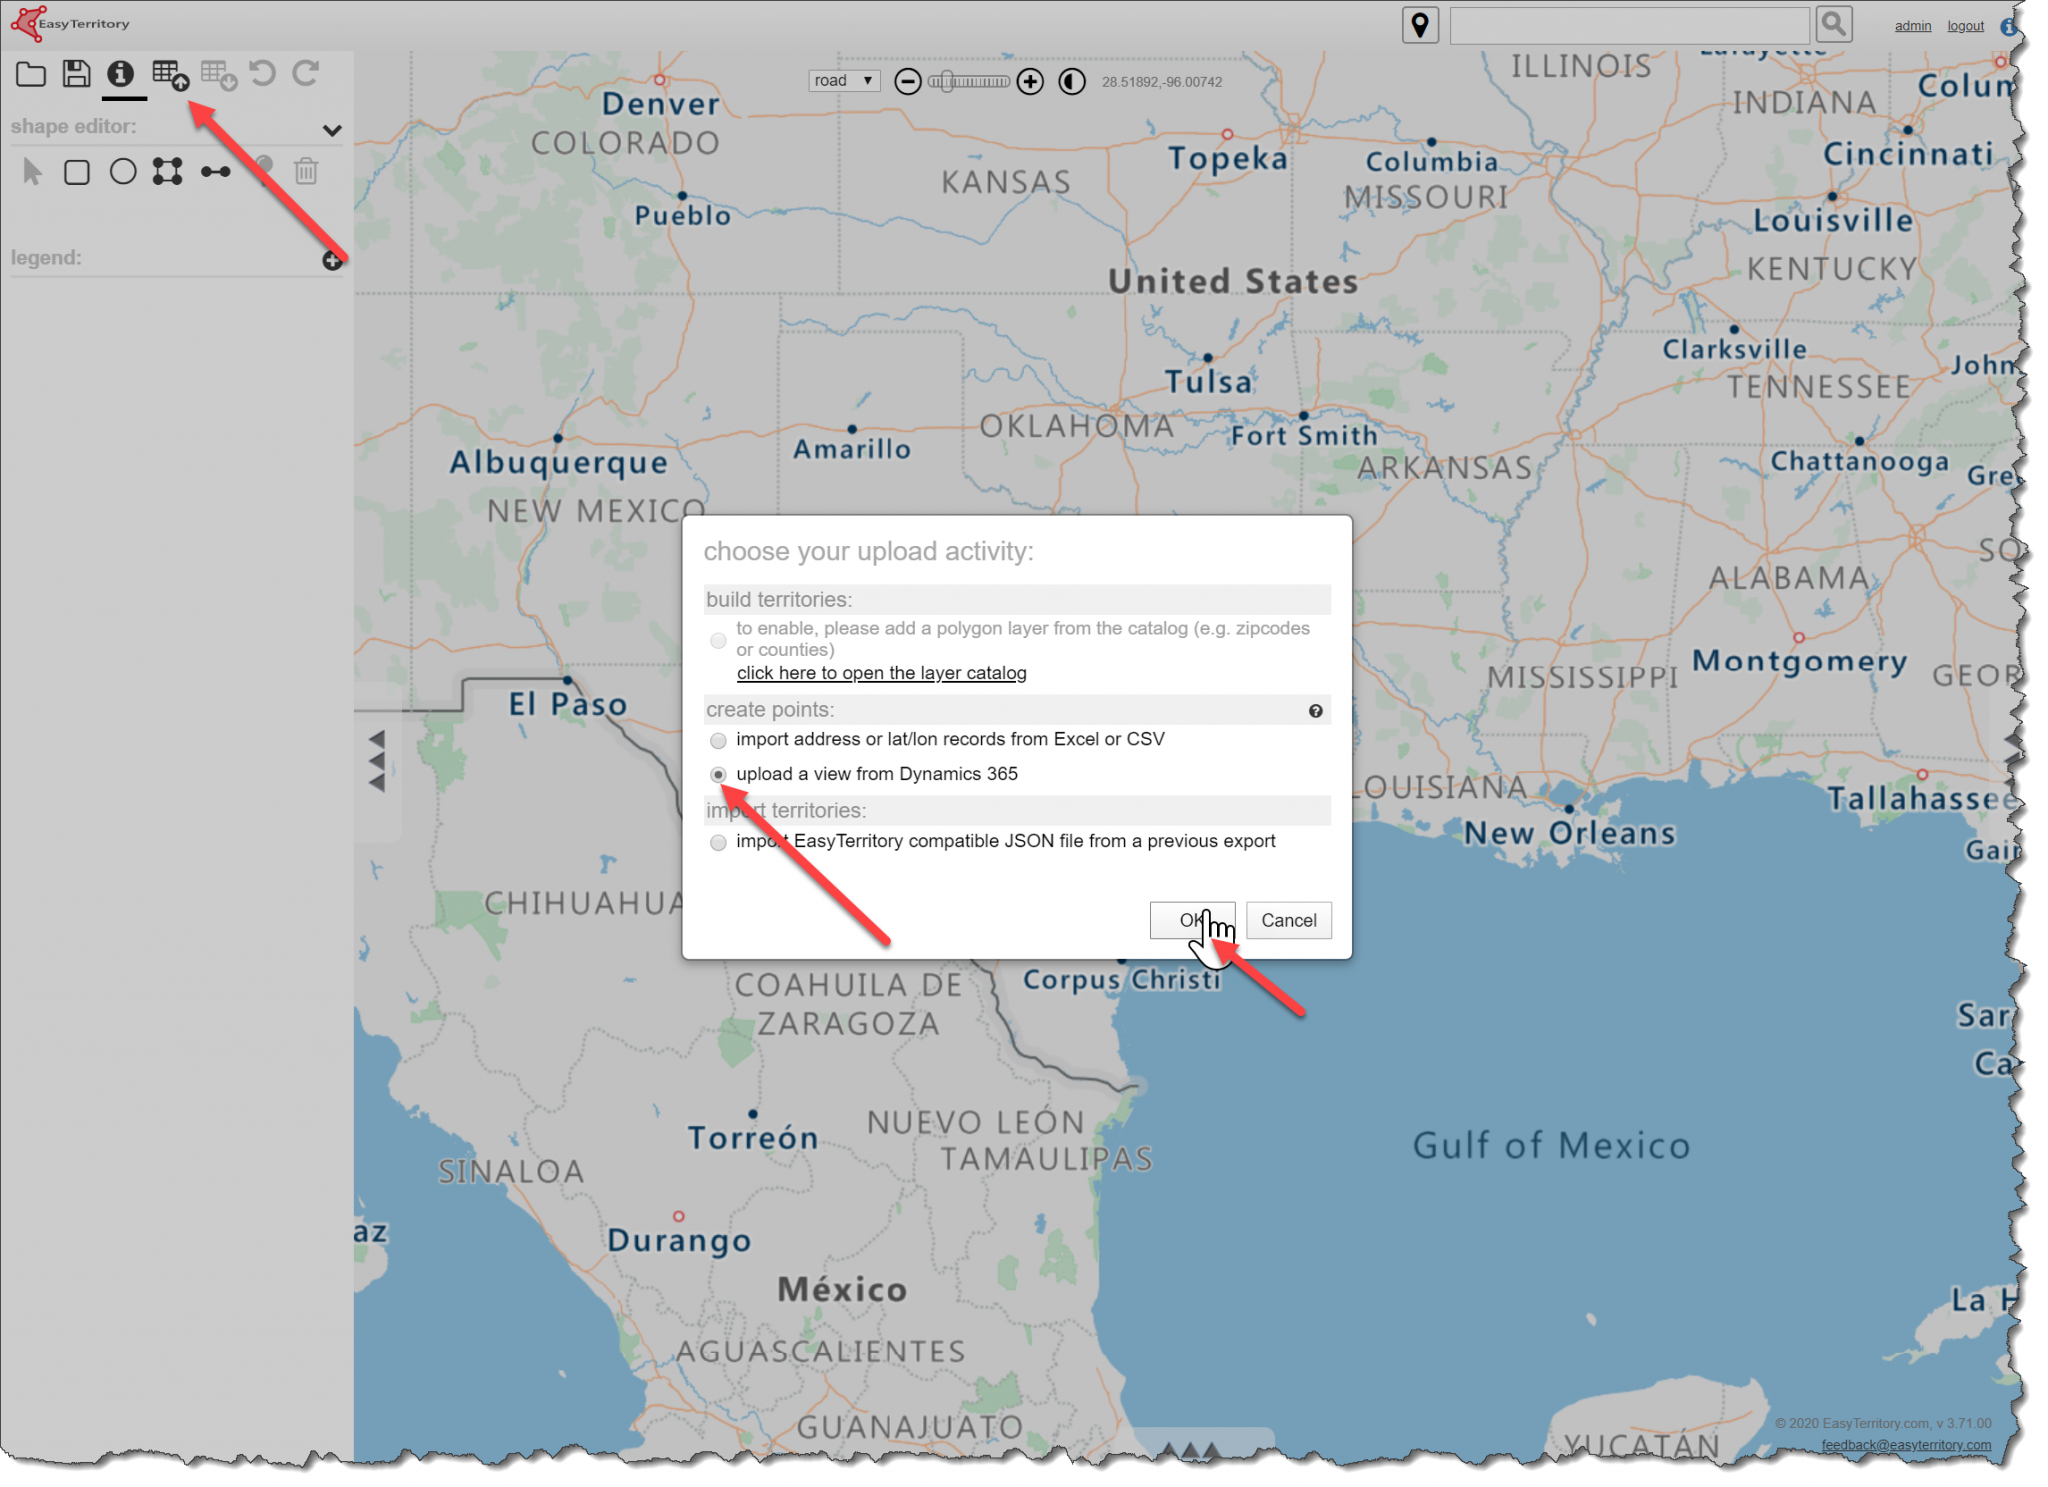
- Once your view is created and published, you can now map the records in EasyTerritory. In the top toolbar, click the ‘Data Upload’ button and select ‘Upload a view from Dynamics 365’.
Step 4. Configure Location Columns
In the upload dialog:
- Select the columns that contain your address fields and/or latitude and longitude fields.
- Review the column mappings.
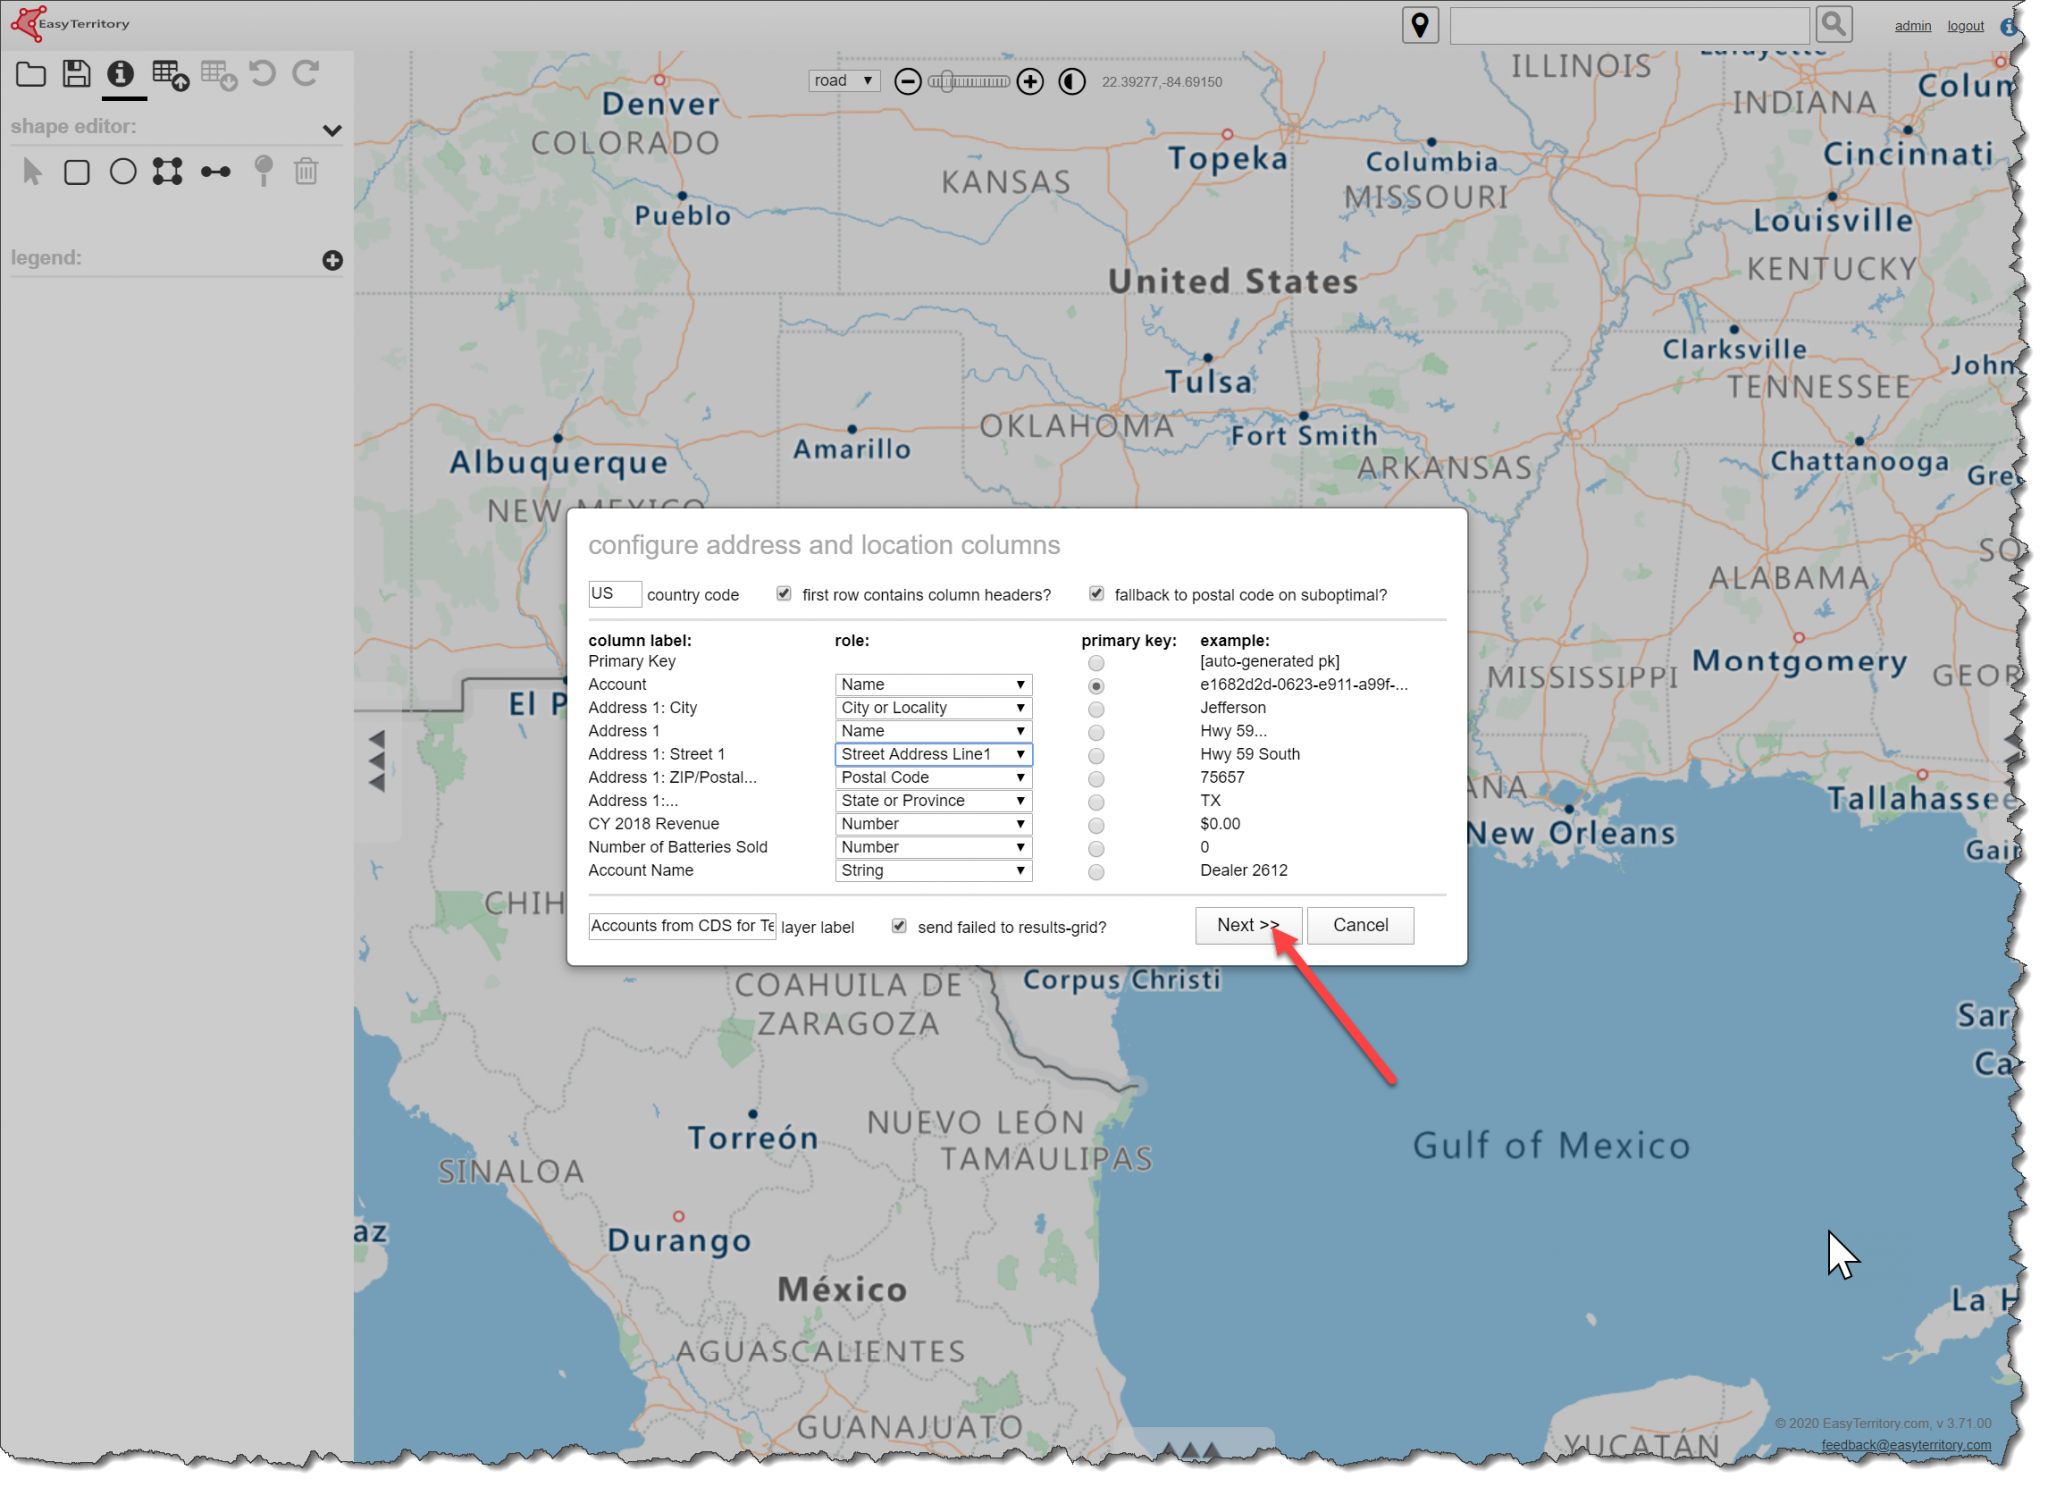
If no latitude and longitude fields are selected, EasyTerritory will automatically geocode the records during the upload.
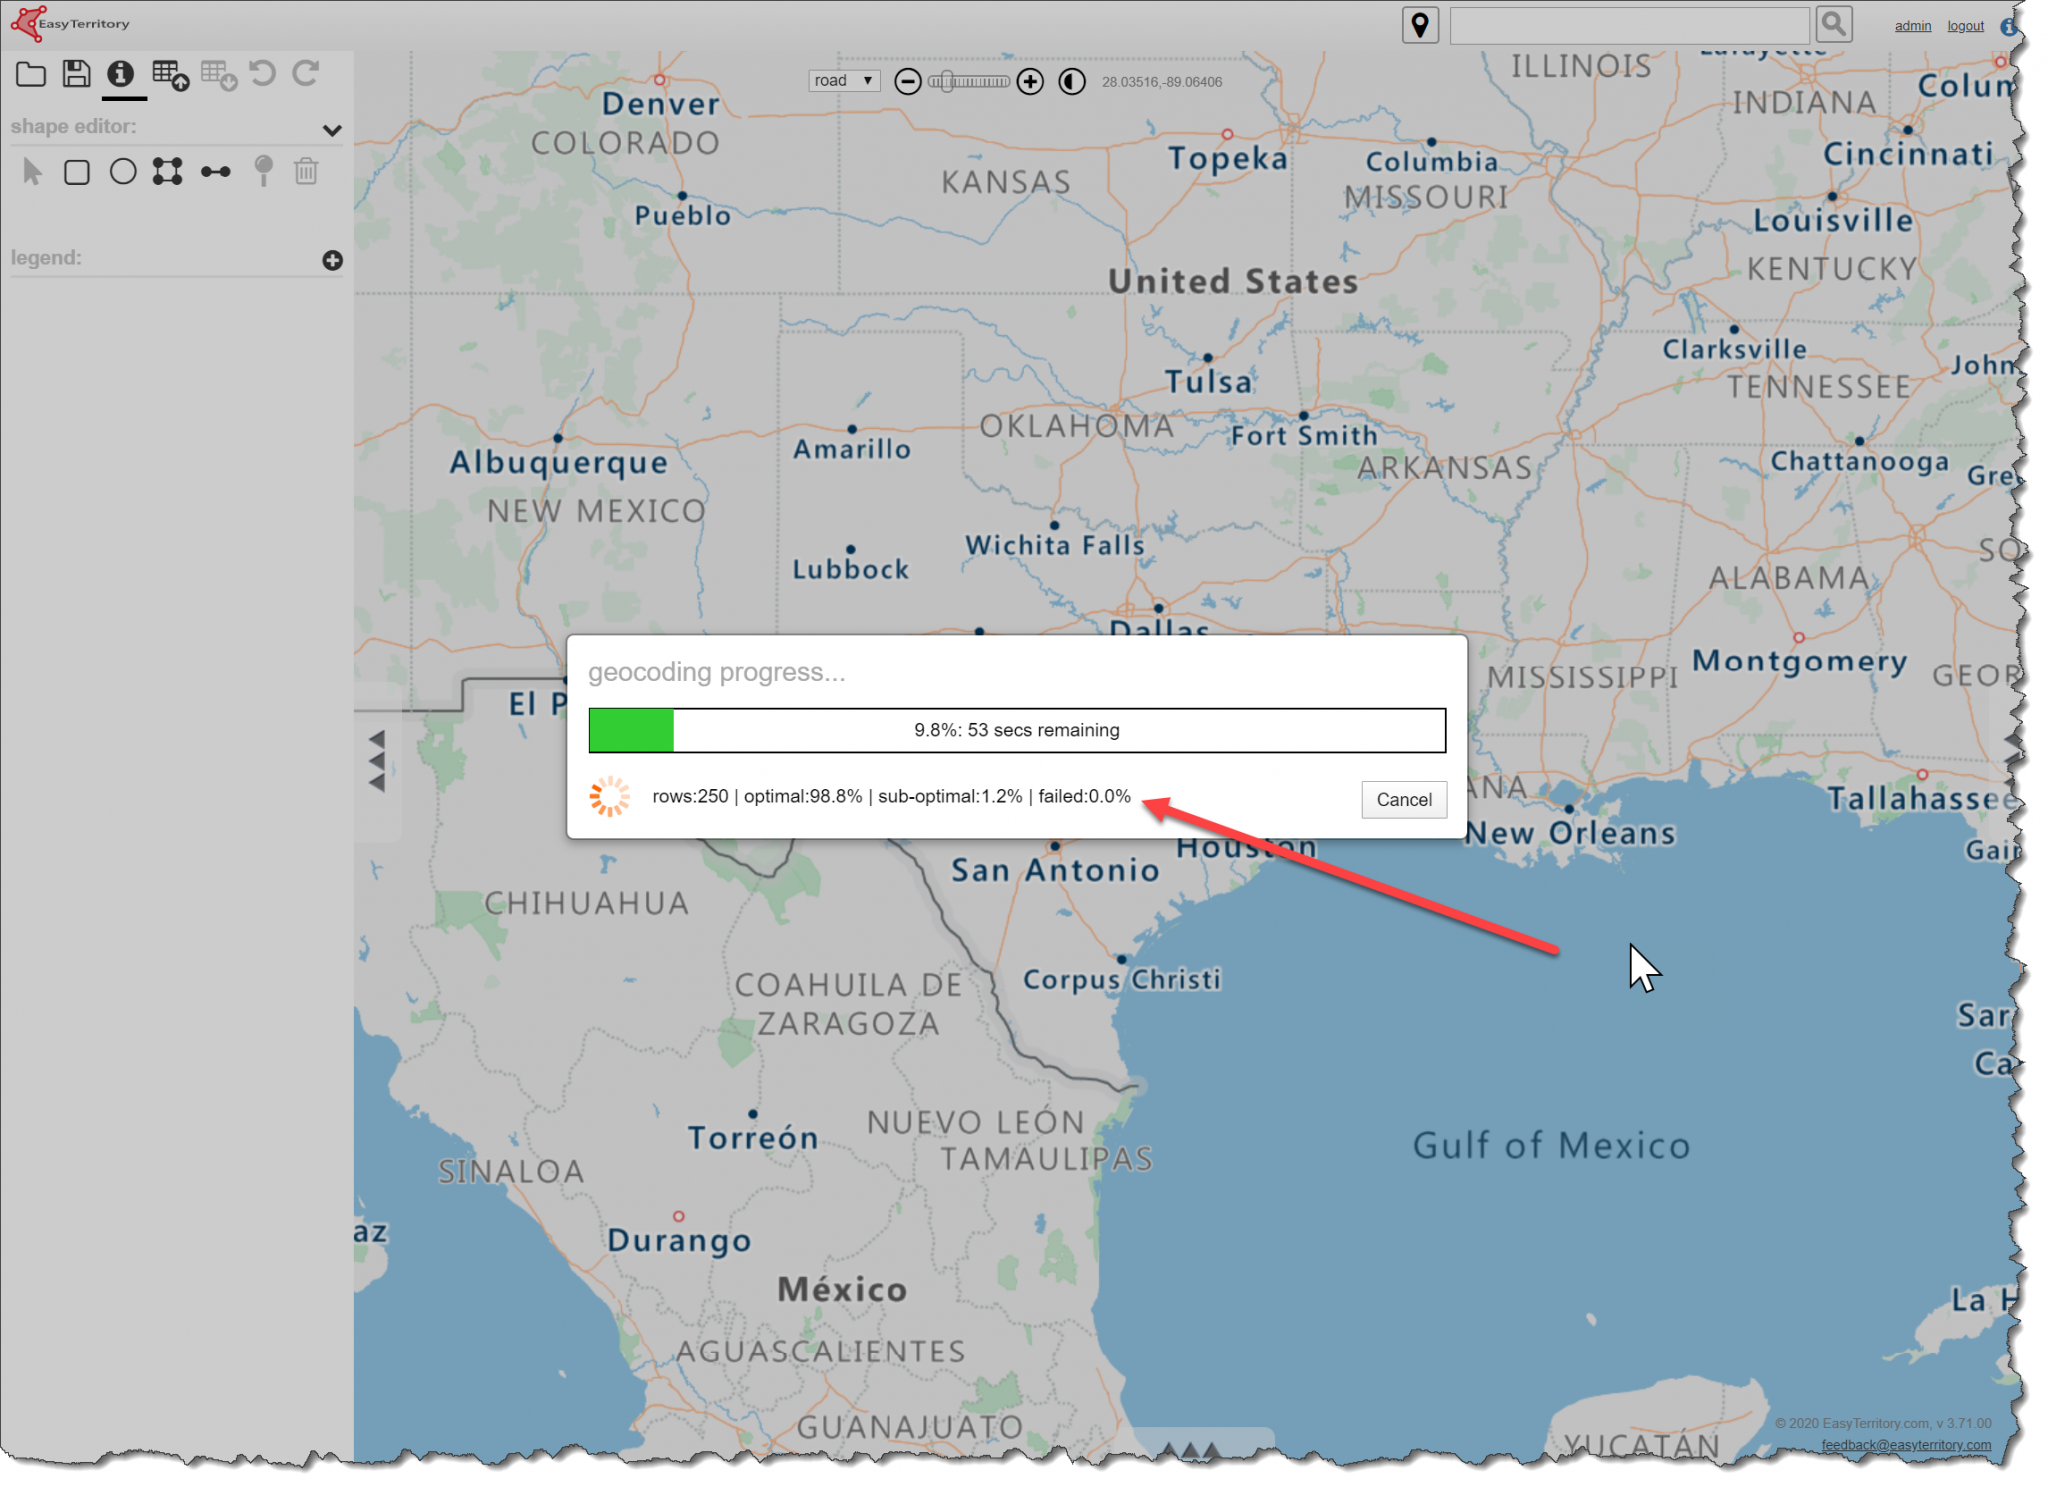
Step 5: View the Results
After the upload completes, the records from your Dataverse view are displayed on the map using Azure Maps or Bing Maps.

Your Dataverse records are now available for visualization and spatial analysis within EasyTerritory.